
 Games
Games
Choosing the right stratagems is crucial when preparing your equipment for each mission. Your weapons may always remain the same, but stratagems should be selected depending on the mission objectives and the enemy faction you are fighting.
The blix.gg team has compiled a dash list of stratagems in Helldivers 2 based on the update, their potential, and player feedback.
Highlights
- This is a tier list of Helldivers 2 stratagems based on experience on all difficulty levels, practical experience, and advice from other players.
- Strengths and weaknesses of stratagems, their usefulness
Helldivers 2 Stratagems Tier List
Here are our rankings for the best stratagems in Helldivers 2:
Tier S
Railgun, Auto Cannon, Quasar Cannon, Shield Generator Pack, Eagle Airstrike, Orbital Laser, Expendable Anti-Tank, Orbital Railcannon Strike, Auto Cannon Sentry
Tier A
Arc Thrower, Grenade Launcher, Recoilless Rifle, Guard Dog Rover, Supply Pack, Patriot Exosuit, Eagle Cluster Bomb, Eagle 500KG Bomb, EMS Mortar Sentry, Orbital Precision Strike
Tier B
Stalwart, Recoilless Rifle, Laser Cannon, Jump Pack, Eagle 110MM Rocket Pods, Eagle Napalm, Rocket Sentry, Gatling Sentry, Shield Generator Relay, Mortar Sentry
Tier C
Anti Material Rifle, Orbital Airburst Strike, Flamethrower, Machine Gun, Heavy Machine Gun, Spear, Orbital Gatling Barrage, Orbital Walking Barrage, Orbital EMS Strike, Orbital Smoke Strike, Orbital Gas Strike, Eagle Strafing Run, Eagle Smoke Strike, Orbital 120MM HE Barrage, Orbital 380MM HE Barrage, Machine Gun Sentry
Tier D
Guard Dog, HMG Emplacement, Tesla Tower, Anti-Personnel Minefield
Tier F
Incendiary Mines, Ballistic Shield
S-tier
Railgun
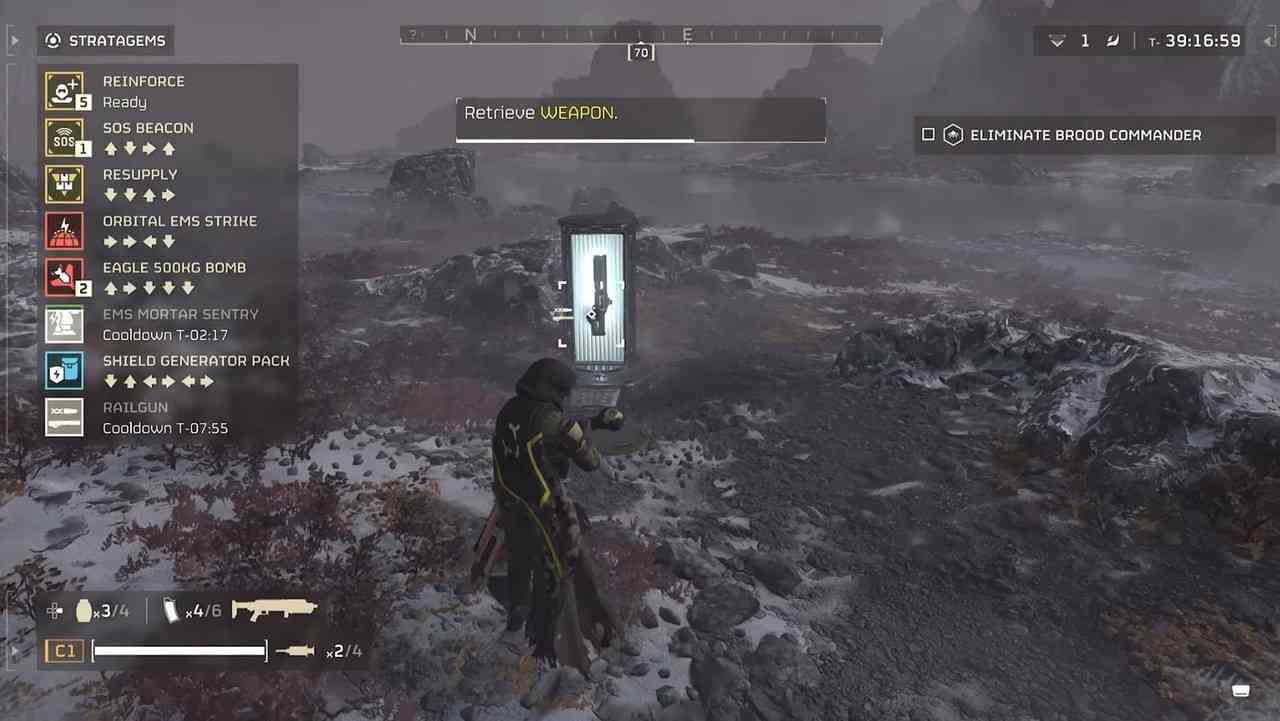
The Railgun can tear through most enemies
Call-In Time: 3 seconds
Uses: Unlimited
Cooldown Time: 480 seconds
Some say this weapon has a downward trend, with Quasar solidifying itself as the new S-tier, but we still reserve the Railgun S-tier.
Players note that this gun can handle most heavers despite their armor. The Railgun can also remove armor from chargers, probably one of its most essential features.
With the Railgun, you can single-handedly deal with Bile Titans as long as you have a supply of ammo. It pairs incredibly well with the Engineer and Medic perks. Both are very strong.
Autocannon
Call-In Time: 3 seconds
Uses: Unlimited
Cooldown Time: 480 seconds
This stratagem has players noting accuracy at long distances, which helps pick off the bigger ones and let your teammates deal with the smaller ones. Remember to reload before you run out of ammo.
Quasar Cannon
Call-In Time: 3 seconds
Uses: Unlimited
Cooldown Time: 480 seconds
Since its introduction as a new stratagem, the Quasar Cannon has become the best choice in almost any situation if you can avoid being outnumbered. Moreover, it's the best weapon against Bile Titans, capable of taking them down with just two headshots.
Shield Generator Pack

Shield Generator Pack
Call-In Time: 5 seconds
Uses: Unlimited
Cooldown Time: 480 seconds
Shield Generator Pack works perfectly on all maps and against all enemies. It protects you from stuns, blocks missiles, and dramatically increases your chances of survival. In combination with light armor, it is an indispensable tool.
Eagle Airstrike
Call-In Time: 0 seconds
Uses: 2
Cooldown Time: 15 seconds
We placed the Eagle Airstrike on the S-tier as players have noted its usefulness and consider it versatile throughout the game. This airstrike can quickly destroy targets, exterminate enemies, and even heavy guns in one go.
Orbital Laser

Orbital Laser
Call-In Time: 2 seconds
Uses: 3
Cooldown Time: 300 seconds
We also put this stratagem in the S-tier since it targets automatically and can single-handedly massacre an entire camp. Players note that it is beneficial, especially for big targets.
Expendable Anti-Tank
Call-In Time: 2 seconds
Uses: Unlimited
Cooldown Time: 60 seconds
This weapon can single-handedly shoot chargers and is ready with a low cooldown.
As players have noted, this is an excellent advantage of anti-tank missiles. Throw out two rockets for convenience, and 60 seconds later, you have one for the next battle.
Orbital Railcannon Strike
Call-In Time: 1 seconds
Uses: Unlimited
Cooldown Time: 210 seconds
It has a lower cooldown than the orbital laser but no restrictions on use. It is swift and destroys targets and everything else in one hit.
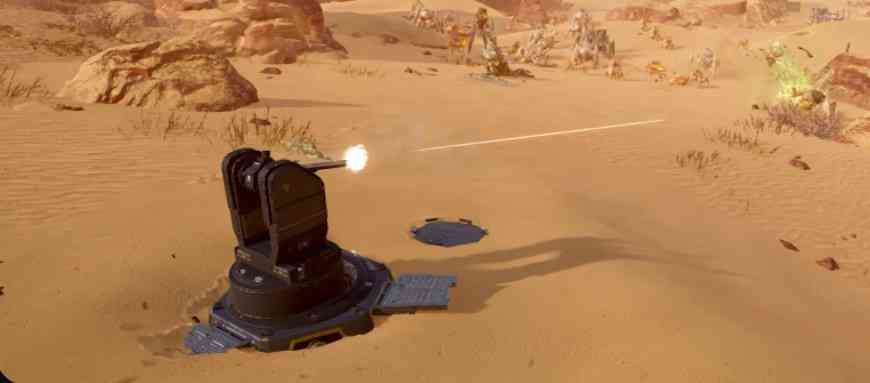
Autocannon Sentry
Call-In Time: 0 seconds
Uses: Unlimited
Cooldown Time: 180 seconds
As players have noted, the Autocannon Sentry has a long range and good damage. It can rack up many kills and support the team well if well placed. The main problem is that Chargers will always go for them as soon as you drop them.
A-tier
Arc Thrower

Arc Thrower
Call-In Time: 3 seconds
Uses: Unlimited
Cooldown Time: 480 seconds
With this stratagem, you can kill three creatures after charging. Arc Thrower is great against armor but doesn't do too much damage per hit. As players have noted, sometimes it doesn't hit the enemy right before you.
Grenade Launcher
Call-In Time: 3 seconds
Uses: Unlimited
Cooldown Time: 480 seconds
Players have noted that the Grenade Launcher helps mop up groups of enemies and take out targets without forcing you to carry a backpack. It combines well with a supply backpack, as it quickly runs out of ammo.
Recoilless Rifle
Call-In Time: 3 seconds
Uses: Unlimited
Cooldown Time: 480 seconds
Recoilless Rifle deserves a place in the A-tier because, according to player reviews, this weapon can inflict the highest DPS. But it has disadvantages, and that's why it's not on the S-tier. The drawbacks are ammo consumption, taking up a slot in your backpack, and competing to take down large creatures through orbits. It also has a very long reload time.
"Guard Dog" Rover
"Guard Dog" Rover
Call-In Time: 5 seconds
Uses: Unlimited
Cooldown Time: 480 seconds
According to players, Guard Dog Rover will clear anything it can get its hands on. Its drawbacks are frequent friendly fire and the impossibility of being stealthy.
Supply Pack
Call-In Time: 5 seconds
Uses: Unlimited
Cooldown Time: 480 seconds
The Supply Pack is indispensable in any outfit. It provides extra ammo, grenades, and stimulants. Players note its usefulness, especially if they are using a grenade launcher. Although it will take up space in your backpack, it will provide you and your team with ammo.
Players must remember that it gives you two stims and two grenades in addition to ammo, which is very valuable.
EXO-45 Patriot Exosuit
Call-In Time: 0 seconds
Uses: 2
Cooldown Time: 600 seconds
The Patriot Exosuit is equipped with a machine gun and rockets, perfect for destroying tanks and keeping tiny pests at bay.
Eagle Cluster Bomb
Eagle Cluster Bomb
Call-In Time: 0 seconds
Uses: 4
Cooldown Time: 15 seconds
Players note the usefulness of this stratagem when quickly mopping up large groups of enemies with a short timer. However, this stratagem needs to do more with objectives and heavyweights. It also has friendly fire as well.
Eagle 500KG Bomb
Call-In Time: 0 seconds
Uses: 1
Cooldown Time: N/A
Eagle 500KG Bomb requires precise targeting due to its smaller kill zone. According to players, it is the only thing that can take out Titans in one quick hit with a direct hit. Its primary disadvantage is its low AoE and the fact that it is an unguided bomb.
EMS Mortar Sentry
Call-In Time: 0 seconds
Uses: Unlimited
Cooldown Time: 180 seconds
Players have noted that this stratagem works excellently with the mortar turret. It slows down the enemy while the mortar kills them. It is particularly effective in bug-out missions, providing a "free win" button by repeatedly stopping enemy advancement.
Orbital Precision Strike

Orbital Precision Strike
Call-In Time: 4 seconds
Uses: Unlimited
Cooldown Time: 100 seconds
This stratagem is A-level, as it has a fast and accurate single hit that can kill objectives in one hit as long as it hits. The downside is that it takes a long time to hit the target.
B-tier
Stalwart
Call-In Time: 3 seconds
Uses: Unlimited
Cooldown Time: 480 seconds
This stratagem is well suited for fighting swarms. As players note, it may lack armor-piercing, but it makes up for that with the large number of magazines you can carry the ability to reload on the go, and a democratic approach to effective sweeps. However, it's still a stratagem that needs improvement, so it's on the B-tier.
Laser Cannon
Call-In Time: 3 seconds
Uses: Unlimited
Cooldown Time: 480 seconds
After upgrades, it pierces armor and does decent damage on various targets. The downside is the heat.
Opinions differ here. Some say the weapon's damage is too low. Others say the laser cannon's main strength is its range, which should be used to support the team and fight against stronger enemies.
Jump Pack

Jump Pack
Call-In Time: 5 seconds
Uses: Unlimited
Cooldown Time: 480 seconds
It lets you jump over obstacles or enemies, significantly increasing your mobility. This can save your life and allow you to climb higher cliffs, but you can't control your jump once you take off, hence the stratagem in the B-tier list.
Eagle 110MM Rocket Pods
Call-In Time: 6 seconds
Uses: Unlimited
Cooldown Time: 240 seconds
Eagle 110MM Rocket Pods can deliver powerful strikes against large targets, but their fickleness and limited ammunition compared to other variants make them risky.
Eagle Napalm Airstrike
Eagle Napalm Airstrike
Call-In Time: 0 seconds
Uses: 2
Cooldown Time: 15 seconds
It deals a good amount of damage, killing small mobs and setting large ones on fire. However, the standard Eagle Airstrike overshadows its effectiveness.
Rocket Sentry
Call-In Time: 3 seconds
Uses: Unlimited
Cooldown Time: 180 seconds
Rocket Sentry has difficulty dealing with large targets, as it can miss and doesn't penetrate armor very much. As players have advised, it is best suited for dealing with automatic drop ships.
Gatling Sentry
Call-In Time: 0 seconds
Uses: Unlimited
Cooldown Time: 180 seconds
It provides excellent suppressive fire, and players note that it can take out entire groups of enemies, as it has a medium armor feather and low CD.
Shield Generator Relay

Shield Generator Relay
Call-In Time: 0 seconds
Uses: Unlimited
Cooldown Time: 90 seconds
Shield Generator Relay is great for cover and makes fighting with automatons much easier, but it's stationary and not very large, making it not very useful.
Mortar Sentry
Call-In Time: 0 seconds
Uses: Unlimited
Cooldown Time: 180 seconds
It is your artillery piece. It fires powerful explosives far into enemy lines, dealing massive damage. But it could be better around bugs or in close combat, as it can accidentally blow you up, too.
C-tier
Anti-Material Rifle

Anti-Material Rifle
Call-In Time: 3 seconds
Uses: Unlimited
Cooldown Time: 480 seconds
It is excellent, as it has high damage and penetrates medium armor. Players note that this weapon shows itself especially brightly against bots. The gun has enough ammo in the magazine. Unfortunately, the strong recoil and poor ammo return make it a less preferable option for support.
Orbital Airburst Strike
Call-In Time: 2 seconds
Uses: Unlimited
Cooldown Time: 120 seconds
Orbital Airburst Strike kills light enemies in a small area with a few hits. Although its friendly fire ability requires careful handling, its effectiveness is undeniable.
Flamethrower
Flamethrower
Call-In Time: 3 seconds
Uses: Unlimited
Cooldown Time: 480 seconds
A recent buff has turned the flamethrower into a nightmare for bugs. It comes in handy for low difficulties, but bringing machine guns and Flamethrowers could be more helpful when you're fighting Chargers and several Bile Titans simultaneously. It will take too long to destroy big units.
Machine Gun
Call-In Time: 3 seconds
Uses: Unlimited
Cooldown Time: 480 seconds
As solo players have noted, reloading is relatively fast, and the medium armor-piercing feather is very helpful in eliminating even the biggest enemies. However, the terrible ammo economy and awkward reload mechanics dropped it to the bottom of our list.
Heavy Machine Gun
Call-In Time: 8 seconds
Uses: Unlimited
Cooldown Time: 480 seconds
While doing more damage than its standard counterpart, the heavy machine gun suffers disadvantages such as forced downward aiming for accuracy, slow reload times, and rapid depletion of ammunition without the ability to penetrate armor.
Spear

Spear
Call-In Time: 3 seconds
Uses: Unlimited
Cooldown Time: 480 seconds
It is simply fantastic, providing good range and damage. However, reliability issues and a complicated lock-on mechanism make it a disappointing choice. However, its damage is not bad if you hit the target.
Orbital Gatling Barrage
Call-In Time: 2 seconds
Uses: Unlimited
Cooldown Time: 80 seconds
It is effective against weak opponents and boasts a favorable cooldown.
Orbital Walking Barrage

Orbital Walking Barrage
Call-In Time: 3 seconds
Uses: Unlimited
Cooldown Time: 240 seconds
Its ability to destroy enemy formations is excellent, but it needs to be more compelling against tanks and turrets. If you're lucky, you can weaken large bases and hit targets.
Orbital EMS Strike
Call-In Time: 2 seconds
Uses: Unlimited
Cooldown Time: 75 seconds
Freezes enemies in place, providing strategic control in combat. But if you choose a mortar, it's better.
Orbital Smoke Strike
Call-In Time: 2 seconds
Uses: Unlimited
Cooldown Time: 100 seconds
This stratagem is in the C-tier because it provides an advantage. However, it is minimal and exacerbated by the long timeout and ineffective utility in combat.
Orbital Gas Strike

Orbital Gas Strike
Call-In Time: 2 seconds
Uses: Unlimited
Cooldown Time: 75 seconds
While Stratagem can be helpful, its actual damage and gas cloud duration could be higher, making it a less practical choice.
Eagle Strafing Run
Call-In Time: 0 seconds
Uses: 3
Cooldown Time: 15 seconds
It takes out bugs in a decent area but lacks armor piercing.
Eagle Smoke Strike

Eagle Smoke Strike
Call-In Time: 2 seconds
Uses: Unlimited
Cooldown Time: 15 seconds
It doesn't do much in utility, but you can briefly block the enemy's line of sight. But that's about it.
Orbital 120MM HE Barrage
Call-In Time: 5 seconds
Uses: Unlimited
Cooldown Time: 240 seconds
The unpredictability and risk of friendly fire make this stratagem a dangerous choice. Players note few hits, low AOE, and damage.
Orbital 380MM HE Barrage
Call-In Time: 6 seconds
Uses: Unlimited
Cooldown Time: 240 seconds
This is a more powerful version of the 120mm cannon with increased firepower. However, players note that the projectiles are spaced too far apart, and the AOE is too low, so this stratagem is only suitable for the C-tier.
Machine Gun Sentry
Machine Gun Sentry
Call-In Time: 3 seconds
Uses: Unlimited
Cooldown Time: 180 seconds
It is inferior to the Gatling variant, does less damage, and can't penetrate armor. It could be a more effective stratagem. According to players' comments, it can kill only little ones.
D-tier
Guard Dog
Call-In Time: 5 seconds
Uses: Unlimited
Cooldown Time: 480 seconds
Guard Dog is a smaller version of the laser variant with less ammunition. Because of this, it does not penetrate armor and is not popular among players.
HMG Emplacement
Call-In Time: 3 seconds
Uses: Unlimited
Cooldown Time: 180 seconds
The HMG Emplacement has an armor pen ideal for holding the front line or covering a retreat. However, it is not mobile and needs to be turned faster.
Tesla Tower

Tesla Tower
Call-In Time: 3 seconds
Uses: Unlimited
Cooldown Time: 150 seconds
As players note, unfortunately, it's good at killing teammates in a large radius and not too good on heavies, but it can stun.
Anti-Personnel Minefield
Call-In Time: 3 seconds
Uses: Unlimited
Cooldown Time: 180 seconds
Ineffective activation and high risk to the user make these mines a liability rather than an asset.
F-tier
Incendiary Mines
Incendiary Mines
Call-In Time: 3 seconds
Uses: Unlimited
Cooldown Time: 180 seconds
Like landmines, they are of little value and are superior to almost any other stratagem.
Players say, "I despise them, but they're really good for keeping anything but the biggest enemies from getting through an area. Use with caution."
Ballistic Shield
Call-In Time: 5 seconds
Uses: Unlimited
Cooldown Time: 300 seconds
Ballistic Shield provides armor and protects you mainly on one side but restricts you from using weapons. Players talk about it being useless, hiding behind a rock, and shooting being more accessible.
Summary
- Our experience and the players' have helped us compile this range sheet. We hope it will make your choice easier and help you understand the advantages and disadvantages of each stratagem. Other articles on a variety of topics can familiarise you with our section.
