

Choosing the right CS2 skin finish typically depends on three key factors: how the finish reacts to Source 2 lighting, how it appears at common wear levels (such as Field-Tested), and if pattern variation affects the final look.
We’ll explain the most popular CS2 finish styles—Custom Paint, Gunsmith, Hydrographic, Anodized, Anodized Multicolored, Spray-Paint, Patina, and Solid Color—so you can buy smarter based on your goal: premium, flashy, budget, or wear-tolerant.
In this guide, “most popular” refers to finish styles commonly found in high-demand and frequently traded skins, based on typical market activity and player preferences.
Contents
- 1 CS2 Skin Finishes Explained: Finish vs Pattern Seed vs Float
- 2 How CS2 Lighting Affects Skin Finishes (vs CS:GO)
- 3 All CS2 Finish Styles Explained (How They Work In-Game)
- 4 Solid Color Style
- 5 Spray-Paint Style
- 6 Hydrographic Style
- 7 Anodized Style
- 8 Anodized Multicolored Style
- 9 Anodized Airbrushed Style
- 10 Patina Style
- 11 Custom Paint Style
- 12 Gunsmith Style
- 13 What Makes a CS2 Skin Finish “Popular” in 2026?
- 14 Popularity signals we use
- 15 Popularity vs Price in CS2 Skins
- 16 How CS2 Skin Finishes React to Wear (Float Impact Explained)
- 17 CS2 finishes that stay clean at mid floats
- 18 CS2 finishes that degrade fast at mid floats
- 19 CS2 float “sweet spots” by finish type
- 20 How to Inspect a CS2 Finish Before Buying
- 21 Best CS2 Skin Finishes by Goal (Clean, Budget, Flashy, Wear-Tolerant)
- 22 CS2 Skin Finishes FAQ (Patterns, Float & Value Explained)
- 23 Do pattern seeds matter for every finish?
- 24 Which finishes look best in Field-Tested?
- 25 Why does the same finish look different in CS2 vs CS:GO?
- 26 Which finishes pair best with stickers?
- 27 How to Choose the Right CS2 Skin Finish
CS2 Skin Finishes Explained: Finish vs Pattern Seed vs Float
In CS2, finish is the paint application method the skin uses — basically the “recipe” that tells the game how the artwork is applied to the weapon model (metallic coating, painted art, hydro-dipped pattern, etc.).
- Finish — the paint method used on the skin (metallic, painted art, hydro-dipped pattern, etc.). It defines the overall “type of look” and how the skin tends to reflect light and show wear.
- Pattern seed (index) — the layout variation for finishes that use patterns. It changes where the design lands on the gun (some seeds look better than others).
- Float (wear) — the condition level (FN – BS). It controls how scratched the skin looks, regardless of pattern.
How CS2 Lighting Affects Skin Finishes (vs CS:GO)
CS2 uses Source 2 with physically based rendering (PBR), which makes materials like metal, paint, and reflections respond more noticeably to lighting conditions.
If you're building a high-end loadout around premium finishes, check out our guide to the best Karambit knife and glove combos in CS2 to pair finishes with matching gloves for a cohesive look.
All CS2 Finish Styles Explained (How They Work In-Game)
In CS2, a finish style is the surface “treatment” that decides how the design sits on the weapon and how it behaves in-game. It influences how the skin displays shine and texture in Source 2, how wear appears across different float values, and how much visual variation exists between copies. Choose a finish style for the vibe you want first, then shop by float and inspect screenshots to avoid surprises.
Solid Color Style
- Look in CS2: Clean, simple blocks of color — like a “blank canvas.”
- Wear behavior: Scratches can appear quickly, especially on edges and high-contact areas.
- Skin Examples: USP-S | Whiteout, Gut Knife | Ultraviolet
- Best for: Sticker builds, simple clean loadouts, budget-friendly picks.
The model is split into preset sections, and each section is filled with a chosen flat color (up to four).
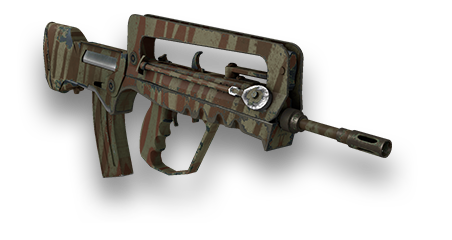
Spray-Paint Style
- Look in CS2: Stenciled layers — a rougher, street-style vibe.
- Wear behavior: Wear is often less noticeable because the finish already has a textured or gritty appearance.
- Skin Examples: AK-47 | Jungle Spray, Classic Knife | Urban Masked
- Best for: Daily drivers and value buys where you don’t want to overpay for perfect floats.
A pattern is applied in layered coats using layered patterns (up to four colors) applied across predefined weapon regions, which control how the pattern appears on different parts of the model.
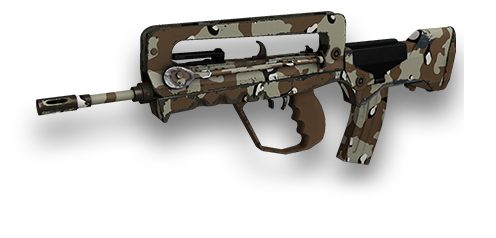
Hydrographic Style
- Look in CS2: Dipped pattern look with lots of movement and variety.
- Wear behavior: The pattern usually hides little scratches better than flat colors.
- Skin Examples: AK-47 | Midnight Laminate, Butterfly Knife | Bright Water
- Best for: Value buys and bold patterns without paying FN premiums.
A film-like pattern is applied across the model, with a mask controlling which areas get pattern and which stay solid color.
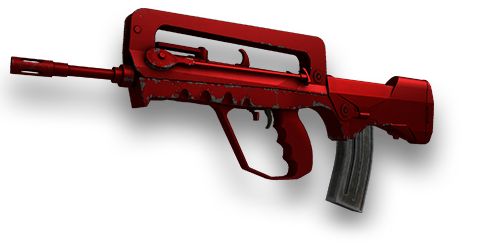
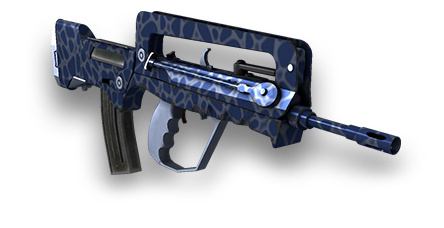
Anodized Style
- Look in CS2: Smooth metallic shine — looks “premium” when it’s clean.
- Wear behavior: Scratches and dull spots stand out because the shine is the whole point.
- Skin Examples: MP9 | Hot Rod, CZ75-Auto | Emerald
- Best for: Clean/premium loadouts (low float is worth it here).
A single chosen color is applied to specific weapon parts to create a clean metallic-tint look.
Anodized Multicolored Style
- Look in CS2: Metallic multi-tone shine — flashy without being “paint art.”
- Wear behavior: Wear can pop more because changes in shine/contrast are easy to notice.
- Skin Examples: Skeleton Knife | Tiger Tooth, M4A1-S | Blue Phosphor
- Best for: Flashy premium looks (low float recommended).
The finish uses multiple colors and pattern data applied to specific weapon regions, influencing how the anodized effect appears across the model.
Anodized Airbrushed Style
- Look in CS2: A smoother, airbrushed coated feel — often softer gradients.
- Wear behavior: Looks best at low floats; mid wear can make it look flatter.
- Skin Examples: M4A1-S | Fade, Skeleton Knife | Fade
- Best for: Clean looks with a bit more personality than plain anodized.
An anodized finish that uses multiple colors and pattern data to create smooth, airbrushed gradients across the weapon surface. Can support more image-like patterns.
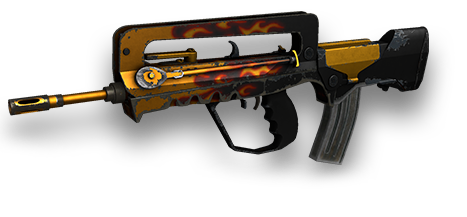
Patina Style
- Look in CS2: Aged, muted metal vibe — more “realistic” and understated.
- Wear behavior: Typically holds up well at higher wear because the aged look still fits (varies by skin/model).
- Skin Examples: AK-47 | Cartel, Skeleton Knife | Case Hardened
- Best for: Wear-tolerant daily drivers and Field-Tested value.
A Patina mask defines where the patina material appears, and its appearance is defined by material properties and wear behavior, which create an “aged metal” look that changes gradually as wear increases.
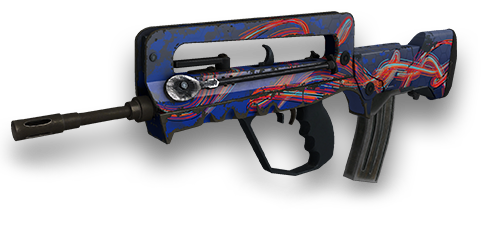
Custom Paint Style
- Look in CS2: Full artwork skins — the classic “poster skin” category.
- Wear behavior: Scuffs/fading can mess with clean art panels and contrast faster.
- Skin Examples: AK-47 | Nightwish, Butterfly Knife | Lore
- Best for: Statement skins (FN/MW or low FT if you want crisp art).
Full-color artwork is applied via textures/UVs, with an alpha wear mask controlling how paint is scratched off over time.
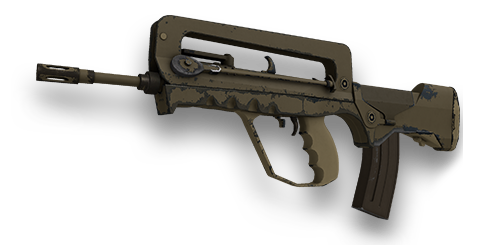
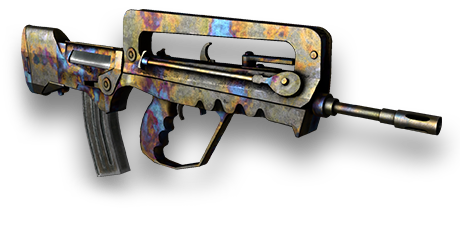
Gunsmith Style
- Look in CS2: A “crafted” mix of metal + paint with lots of detail.
- Wear behavior: Often looks darker as wear increases (can vary by skin and lighting)
- Skin Examples: AK-47 | Inheritance, Butterfly Knife | Autotronic
- Best for: Premium-but-practical picks that still look good in mid floats.
A material mask splits the weapon into Patina-like areas and Custom Paint-like areas, so different parts wear differently.
What Makes a CS2 Skin Finish “Popular” in 2026?
In this guide, “most popular” doesn’t mean “most expensive.” It means the finish styles that show up again and again in skins people actually buy, sell, and equip—and that stay in demand beyond short hype cycles.
Popularity signals we use
- Trade volume: moves often – easy to buy/sell (high liquidity)
- Active listings: widely available – easy to compare and price-check
- Long-term demand: stays relevant for months/years, not just a trend week
- Equip rate: players actually run it in loadouts (not just collectors)
- Price stability: fewer sudden crashes when hype changes
If you prefer bold and aggressive aesthetics, explore the best red CS2 inventory skins to see how different finishes work together in a themed loadout.
Popularity vs Price in CS2 Skins
- Rarity can raise price without raising demand (expensive doesn’t mean widely traded).
- Higher-priced skins can be harder to trade due to a smaller pool of buyers, although demand and rarity also play a major role in liquidity.
- Mid-tier finishes can be “most popular” because they’re affordable and common.
- Wear-tolerant finishes often win since Field-Tested still looks good, making them easier to buy “correctly.”
How CS2 Skin Finishes React to Wear (Float Impact Explained)
CS2 finishes that stay clean at mid floats
These finishes usually keep their core look in Field-Tested and even some Well-Worn, because scratches blend into the design or the material doesn’t “flake” dramatically.
- Patina: already “aged” by design, so added wear looks natural.
- Hydrographic: busy patterns hide small scratches well.
- Spray-Paint: rough/stenciled look makes wear less noticeable.
- Solid Color (often): simple, but many hold up decently because there’s no detailed artwork to “break” (depends on the specific skin).
- Some Gunsmith: metal-heavy looks can remain readable even when worn.
CS2 finishes that degrade fast at mid floats
These finishes can lose visual clarity faster because wear affects key elements like shine, color intensity, or clean artwork.
- Anodized / Anodized Multicolored: the appeal is the clean metallic sheen—scratches and dulling show earlier and are more obvious.
- Custom Paint Job: large clean art panels can get noticeably scuffed/faded, especially on edges and high-contact areas.
- High-contrast designs in general: when a skin relies on sharp contrast, even small wear can make it look “dirty.”
CS2 float “sweet spots” by finish type
These observations are based on Valve’s finish mechanics combined with common community behavior and trading experience. Use these as shopping targets, not hard rules (some specific skins break the pattern).
| CS2 finish style | How it typically looks in mid floats (FT 0.15–0.37) | Why it “degrades fast” (if it does) |
| Custom Paint Job | Often still good in low FT, but can start showing scuffs | Painted layers get “scrubbed” off as wear increases |
| Gunsmith | Usually readable in FT; tends to look darker with wear | Not “scrubbing” the same way; effect is darkening |
| Patina | Often holds up well; look shifts by saturation change | Aging effect is more gradual (less “flake-off”) |
| Hydrographic | Typically strong in FT/WW because patterns hide wear | Still in the “scrubbed paint layer” group, but patterns can mask it |
| Spray-Paint | Usually fine in FT; wear can feel “natural” | Also “scrubbed paint layer” group, but style tolerates wear |
| Solid Color | Can be okay in low FT; higher FT can look scuffed | Scrubbing is noticeable on large flat color blocks |
| Anodized | Often looks best clean; FT can show scratches more | Metallic look reveals imperfections easily (finish-dependent) |
| Anodized Multicolored | Similar: best clean; pattern can make wear more visible | Designed around varying reflectivities, so wear can stand out |
| Anodized Airbrushed | Can hold up decently, but still benefits from low floats | Same pattern-family properties as several others |
How to Inspect a CS2 Finish Before Buying
- BUY if the finish type + weapon model match what you actually want (no “close enough” substitutes).
- BUY if the float fits your target range and the usual wear zones (edges/rail/mag/grip) still look clean.
- SKIP pattern seed checking unless the finish is clearly pattern-sensitive (big visual differences between copies).
- SKIP any listing you can’t verify under consistent lighting/angles (one flattering screenshot isn’t enough).
If you're looking to get these finishes directly through drops and openings, check out our breakdown of all new CS2 cases in 2026 to see which cases contain the latest skins and finishes.
Best CS2 Skin Finishes by Goal (Clean, Budget, Flashy, Wear-Tolerant)
| Goal | Top finish picks (best fit) | Target float range (practical) |
| Clean / premium look | Anodized, Anodized Multicolored, Gunsmith | Anodized / Multicolored: 0.00–0.15 Gunsmith: 0.00–0.37 |
| Flashy statement look | Custom Paint Job, Hydrographic, Anodized Multicolored | Custom Paint Job: 0.00–0.15 Hydrographic: 0.00–0.37 Multicolored: 0.00–0.15 |
| Budget-but-good | Hydrographic, Spray-Paint, Patina | Hydrographic: 0.00–0.37 Spray-Paint: 0.00–0.44 Patina: 0.00–0.44+ |
| Wear-tolerant daily driver | Patina, Spray-Paint, Hydrographic | Patina: 0.00–0.44+ Spray-Paint: 0.00–0.44 Hydrographic: 0.00–0.33 |
CS2 Skin Finishes FAQ (Patterns, Float & Value Explained)
Do pattern seeds matter for every finish?
No. Pattern seeds mostly matter for finishes where the design is applied as a patterned texture and can land differently on the model (you’ll see noticeable “this one looks different” variation between copies). If two copies look basically identical and only the wear changes, seed isn’t worth chasing—focus on float + screenshots.
Which finishes look best in Field-Tested?
Usually: Patina, Spray-Paint, and Hydrographic. They stay readable because the style is already “textured/busy,” so mid-float scuffs don’t ruin the whole look.
Why does the same finish look different in CS2 vs CS:GO?
CS2’s lighting/material rendering makes reflectivity, roughness, and contrast show up more strongly. Metallic finishes can look shinier (or harsher), and colors can shift depending on map lighting, so two skins that looked similar in CS:GO can separate a lot in CS2.
Which finishes pair best with stickers?
Best sticker “canvas” finishes are ones with clean, readable areas: Solid Color, many Custom Paint Job skins (big panels), and Anodized (clean base). Busier patterns like Hydrographic can still work, but stickers may get visually “lost” unless you use high-contrast designs.
How to Choose the Right CS2 Skin Finish
To choose a CS2 skin finish efficiently, start by defining your goal (clean, flashy, budget, or wear-tolerant), then select a finish type that aligns with it, and finally choose a float range that preserves the finish’s key visual traits. If a finish is pattern-sensitive, check pattern/seed only after you’ve already found the right finish + float; otherwise you’ll waste time chasing “perfect seeds” on skins where it barely matters.