

Monsters are considered the easiest faction to play out of all six available. And deservedly. The archetypes are pretty straightforward, cards are not too complicated and the gameplan is very clear with most decks. Monsters are a very good choice for newer players and a good starting point. They’re not among the strongest factions at the moment, nevertheless they’re still fully capable of carrying you to Pro Rank. A few of the most common archetypes include thrive, relicts, wild hunt and vampires. All of them viable if piloted correctly. So which Monster cards should you craft as a newer player?
Read more: Crafting Guides
‘¢ Gwent Crafting Guide: Skellige
‘¢ Gwent Crafting Guide: Scoia’tael
‘¢ Gwent Crafting Guide: Neutrals
Contents
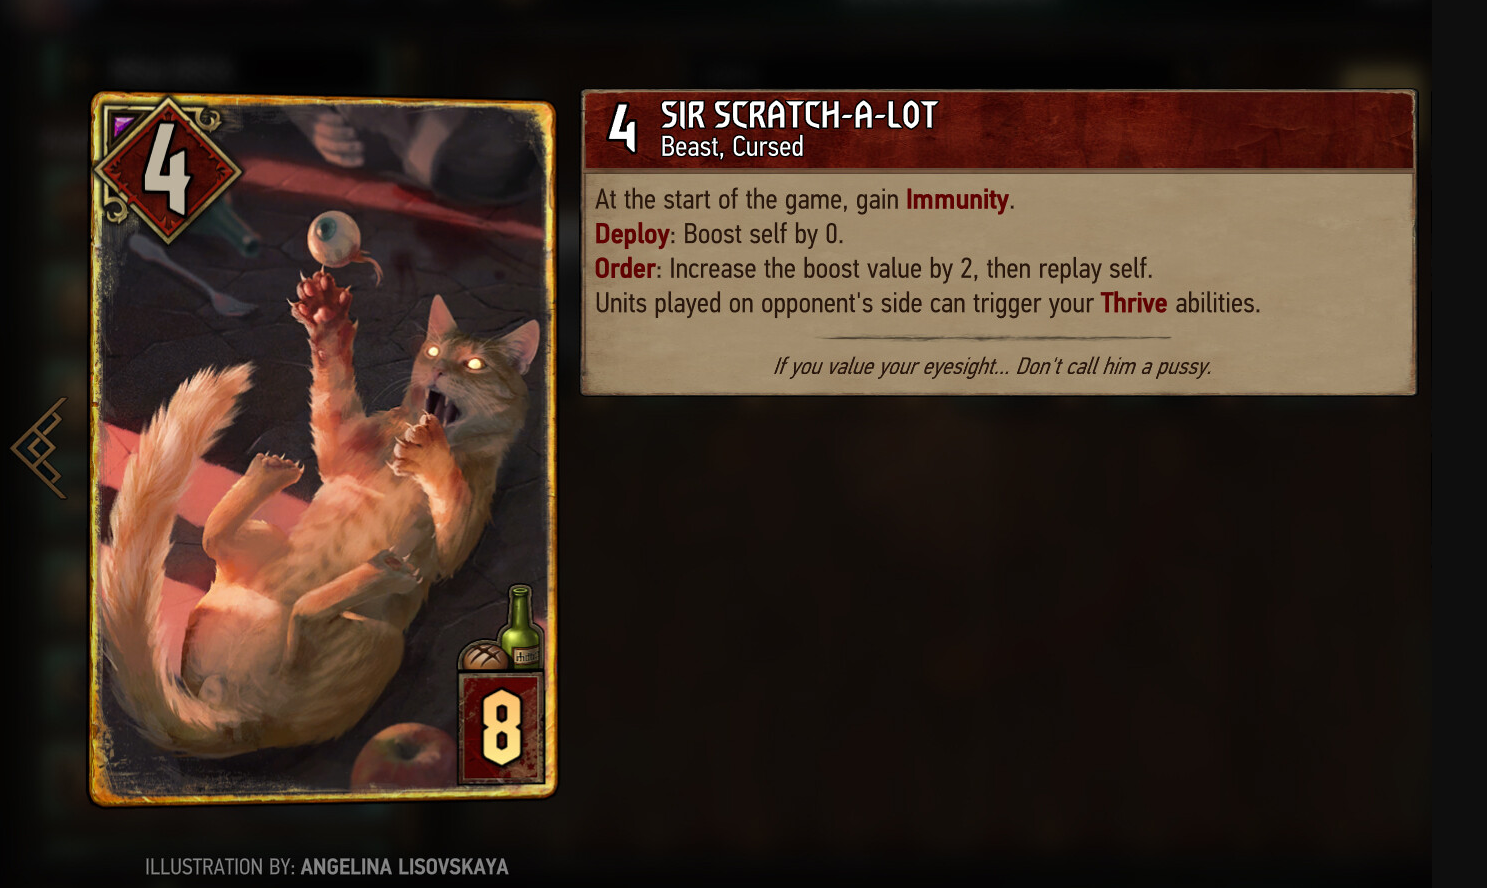
Sir-Scratch-A-Lot
Crafting cost: 200 scraps
This is the newest addition (as of September 2022) to Monster faction. The cat is simply overpowered at the moment and you can’t go wrong with crafting this card. It has two abilities, both very powerful. Firstly, it makes your units thrive (grow) when the opponent plays his units. This ability in itself is game changing. You can simply play Sir Scratch-A-Lot and leave him on the board without using his other ability.
Since he’s immune (untargetable) it’s very hard for the opponent to remove him. From now on all your thrive engines will activate whenever you play a unit and whenever your opponent does it (assuming thrive conditions are met). If you are afraid the cat might get removed as soon as it loses its immunity, just don’t click it, let it sit on the board and do his passive work with your thrive engines. But the true fireworks start when you use his order ability. The cat loses the immunity but you can replay him and boost him by 2 points each turn. In the scenario when Sir Scratch-A-Lot doesn’t get removed or locked, it plays for stupid amount of points. It grows by 2 points each turn, activates your thrive engines when it is replayed and allows them to grow on the opponent’s turn.
 Sir Scratch A Lot
And when you replay him he shakes off any damage received or poison so it must be either locked or killed in one turn to be stopped. That is simply crazy. Even if played without other engines, he grows by 2 points each turn which is basically the same thing The Beast does but without any condition. For 8 provisions (at least at the moment) it’s as good as it gets in Gwent. Scratch-A-Lot is currently Monster’s strongest card and crafting it can move your thrive deck to another level.
Toad Prince
Crafting cost: 200 scraps
One thing Monsters are seriously lacking is control. They just don’t have very many tools to control their opponent’s board. Toad Prince is one of these few options and that’s why he’s valuable. He consumes a unit of up to 4 power so in an ideal scenario he plays for 11 points (3 power body that can remove 4 points from the other side and add it to your side). Plus he can remove an engine to deny any future points it would generate. That’s a very good value and powerful weapon against engine decks.
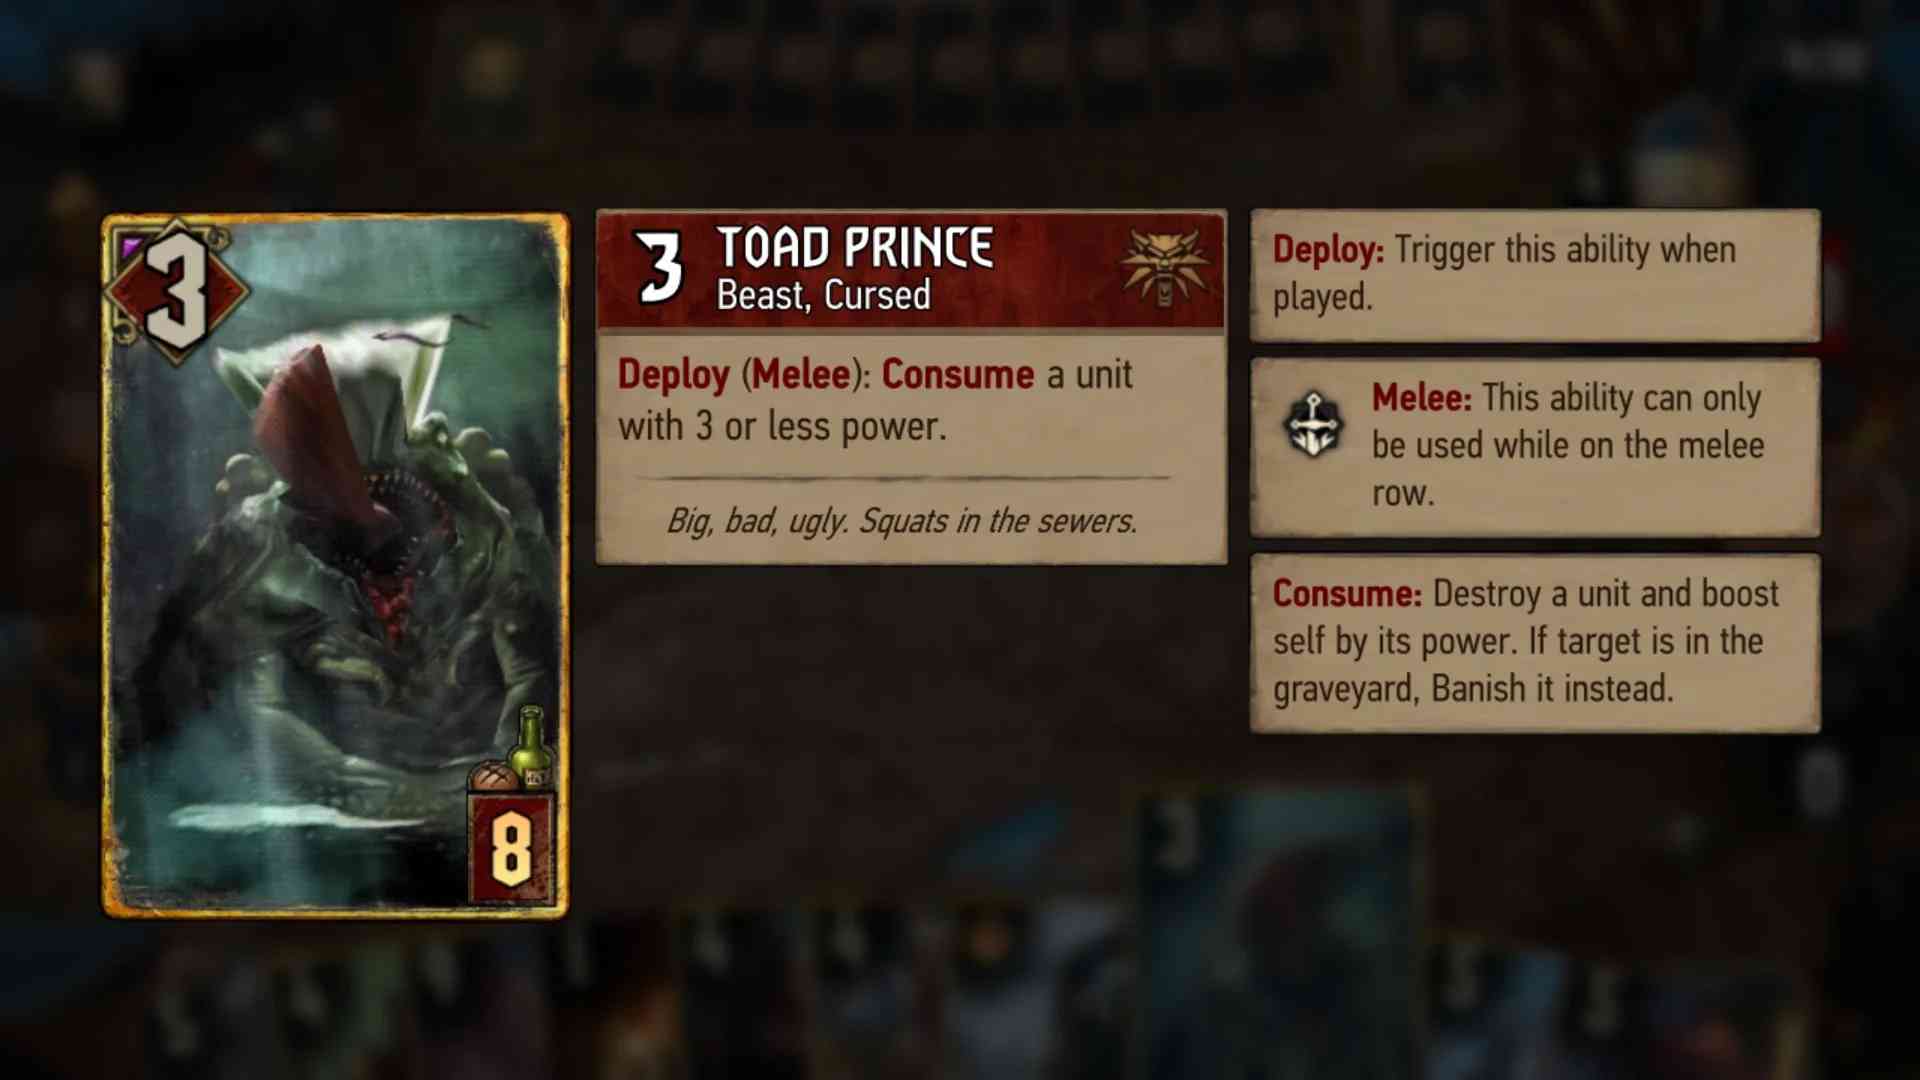
Also remember that Toad Prince can consume your own units so he can be used in Deathwish decks without the risk of bricking (being unable to consume anything on the other side – whether due to defender or all units having higher power). The frog is just a good and reliable card that can fit most Monster decks.
Yghern
Crafting cost: 800 scraps
The times of auto including Yghern in all Monster decks are long gone. Still it can be a decent choice, especially on lower ranks. Played as a first card in a 10-card long round it has 9 armor which is pretty hard to get through. You can even do a risky move and play him as second to last card, hoping the opponent doesn’t have one damage which is often the case. Yghern also works great with Imlerith as it just gets discarded so you don’t have to worry about the armor thing and still get the value.

If you’ve got the scraps, you can consider crafting Imlerith for that combo. However Yghern alone will work too, doing a great job if unanswered. And it’s one of the best targets for Ozzrel which brings us to another card worth crafting.
Ozzrel
Crafting cost: 200 scraps
The most straightforward use of Ozzrel is consuming tall unit from your graveyard. Whether it’s Yghern, Speartip or something smaller like Pugo. Usually reserved for short round 3. That’s why you should always play Ozzrel with tall units like the ones mentioned above. Ozzrel is best if played as your last card with last say in the game (meaning your opponent already played all his cards) as he is susceptible to tall removal and reset cards like Yrden. Losing your 19 point Ozzrel to 4 provision Spores hurts like nothing else.
The second use of Ozzrel is a bit more complex as you are playing him front row to consume something from your opponent’s graveyard. This requires some experience in the game but can really mess your opponent up. You can consume Griffin to brick opponents Mammuna, you can eat Rioghan to deny huge finishers for rain decks, you can consume that 20+ point Melusine which usually ends in instant forfeit by the opponent. Options are numerous. All of this makes Ozzrel a flexible and useful card that shouldn’t have problems finding decent value.
The Crones
Crafting cost: 200 scraps each
The trio, namely Weavess, Brewess and Whispess, works best in Relicts decks but can really fit any Monster deck. They provide flexibility, good value and one of scarce removal options for their faction. Brewess gives you consumes, a utility that works even beyond Deathwish decks. You can use her to consume Yghern or get some value by eating Fruits spawned by Fruits of Ysgith leader. She usually is played as the first one.
Weavess can boost your units, which can prevent them from dying. You can protect your engines like Selfeaters, Witch Apprentice or Nithral. Whispess is a control option able to do 6 damage if played as the last one (each Crone you play makes others stronger). Overall these lovely ladies can be quite useful and are a decent addition to any deck. One last thing to note: when playing all the crones in the same round, please remember about correct placement. Put them all together, next to each other, Whispess on the left, Brewess in the middle and Weavess on the right. Obviously they will work no matter how and where you place them but it’s not about that. Believe me, it’s very important for some people.
Old Speartip
Crafting cost: 800
One of the cards available in Monsters starter deck is Old Speartip: Asleep. On its own it is a very bad card, costing 6 provisions and playing for 6 points which is a terrible deal. You should just replace it with something else. Or you can craft Old Speartip to make the card much more viable. If you own both Speartip cards they create a simple but quite powerful combo. While taking mulligans just make sure that Old Speartip: Asleep is in your hand and Old Speartip is in your deck. Then you play the sleeping guy.
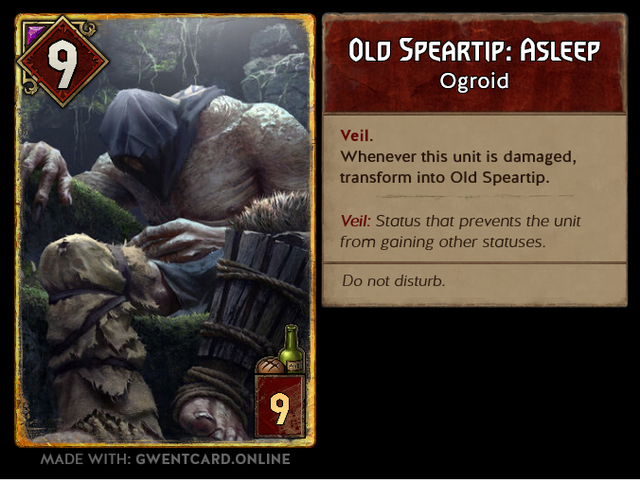
Now few things can happen. The card can get locked which is the worst scenario but not really the end of the world. Your opponent just used lock meaning your Witch Apprentice or some other engine is more likely to go through. In the second scenario Old Speartip: Asleep gets damaged. The card banishes itself and Old Speartip is summoned in its place. Your 6 just effectively turned into 12.
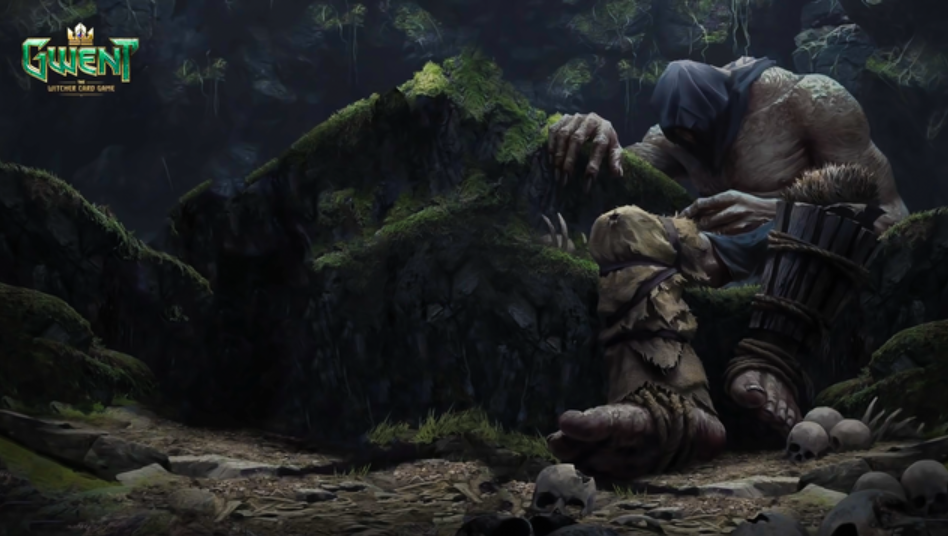 Old Speartip
In the third scenario the giant is not interrupted and the timer goes off. This again makes the card banish itself but summoned Speartip is much stronger as it now has 18 power. We’re talking base power here ‘ meaning it can’t be reset. That’s a huge tempo play and a lot of points on your side of the board. This also thins your deck by one card making it easier to draw your good cards later on. And if the Speartip combo works you get one of the best targets for Ozzrel as he can play for 19 points by consuming the giant from your graveyard.
One thing to remember: you shouldn’t get too greedy with your mulligans. Sometimes it’s better to just leave Speartip in your hand than risk everything by fishing for his asleep version.
Playing a 12-power unit from hand isn’t exactly the worst outcome you can get.
Selfeater
Crafting cost: 80
This is one of the key cards for the relicts archetype. If unanswered it plays for a crazy amount of points for a bronze. It’s not very hard to kill but you can make sure it survives with tools like your stratagem, Carapace leader or even defender. Selfeater is able to split in half every turn (rounding his power down for each copy) and each copy grows by one whenever you play a relict.
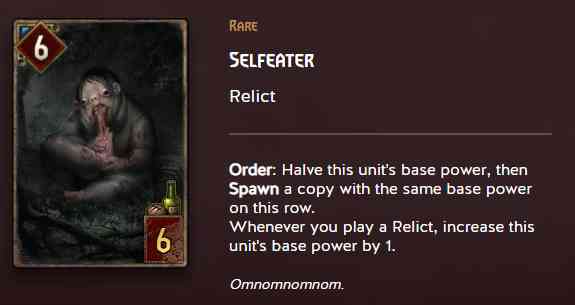
In an ideal scenario a single selfeater is able to split many times setting the power ceiling of this card very high. Another clever use it has is to not split your Selfeater at all and just let the one copy grow to double digits value. And then bring it back in another round with tools like Witches’ Sabbath or Incubus.
This card’s potential makes some decks run Operator just to get one more copy of Selfeater. The downside to crafting this card is the fact that it won’t find much use in different archetypes. You simply have to play relicts to utilize its passive ability.
Endrega Larva
Crafting cost: 80
Larva used to be arguably the strongest bronze card in the game. It was nerfed since then but still is a very decent choice to include in your deck. Fitting mainly the thrive archetype but can work in many Monster decks. Most bronzes from this faction are quite underwhelming so the competition isn’t actually fierce here. Larva starts as a 4 (with two 2-power units) and can quickly spiral out of control. If unanswered, each Larva can easily grow to 7 or 8 power, making it 14-16 for 6 provisions ‘or even more in a 10-card long round.
Removing Larva can be quite awkward for the opponent as usually they have to use one removal tool just to get rid of one of the insectoids. He basically has to trade down in provisions to shut them down. Of course there are some cards that can very cleanly deal with Larvas ‘ Mage Infiltrator being one of them ‘ so keep that in mind. But if your Larvas manage to survive they can bring you great value. Just remember to mulligan them away in a short round as they won’t get enough time to grow.
Read more: 10 reward trees guaranteed to get you more ores
Witch Apprentice
Crafting cost: 30
Commonly known as the piggy. This is just a good card. Upon reaching Sabbath (total of 25 power on one of your rows) Witch Apprentice starts growing by two points per turn. Do not play this card earlier however, it’s crucial it starts growing as soon as it hits the board. 6 power isn’t that easy to remove for the opponent and even if it does get removed you’re most likely trading up in provision as Witch Apprentice is very cheap at 5 provisions.
This card is great for tempo passing, with passive 2 points per turn it might be difficult for the opponent to catch up with one card. But mind Nilfgaard matchups; when your opponent can copy your Witch Apprentice ‘ even multiple times. Which usually will cost you the game. In those matches it might be smart to mulligan the piggy away. Unlike Selfeater this card can successfully be used in non-relicts archetypes. Most Monster decks can easily reach the total power required for Sabbath and Witch Apprentice is just a great and dangerous engine.
Fleder
Crafting cost: 80 scraps
A cornerstone of any vampire deck. They make bleeding much more effective as you gain some points your opponent loses due to bleeding. Once per turn this card grows by the amount of bleeding received by the enemy unit (value of first bleed applies). So if you plan on bleeding two units during your turn ‘ for example: one with Nekurat and one with your Blood Scent leader ability ‘ start with the leader ability. This will make your fleder/fleders grow by 3 points. While using Nekurat first would only grow them by 2 points.
It’s also a good idea to use your leader right after playing Fleder. It will instantly grow his power to 7 making him hard to remove. Fleders do go tall so they are susceptible to tall punish and reset cards. But they are so cheap in terms of provisions you won’t be too sad if your opponent uses his Geralt of Rivia to kill your 6-provision card. When you’re using two Fleders in the same round (or more with Megascope) it’s a good idea to place them in different rows to play around cards like Yrden or Igni. To sum it up: if you want to play the vampires archetype ‘ craft Fleders.
See also: